DIY Essential Oil Candles… made easy!

DIY Essential Oil Candles… made easy!

Ready to learn how to make essential oil candles?

We are so excited to share this fun activity with you!

We did not actually set out to write a blog post on candle making. We were really just thinking that making candles would make a sweet Christmas gift for neighbors. Fortunately, we were inspired to start early because we had no idea how much we had to learn!

We decided to write this post to save you time if making candles is something that sounds fun to you. While normally at Sparkles and Sprinkles we are all about your own creativity, this post will give you very specific information on making very specific candles… in the hopes that you won’t have to go through many wasted candles like we did.

This post tells a bit about our candle making journey and provides clickable links for supplies. You can find our printable guide to essential oil candle making on Etsy.

Luckily our “wasted” candles did not go to waste. We made some of them into a sweet little Advent wreath (and we will probably have enough to keep doing this for a few more years to use all of the candles… yes, we messed up that many!). 

We are frequent users of essential oil diffusers*, and we know our favorite essential oil combinations, so we thought it would be as easy as melting wax and mixing in our favorite combinations of essential oils. But this was not the case.

The first candles we made looked beautiful, and smelled beautiful before they were lit, but once lit, they had almost no scent throw and some of them actually smelled bad while burning. Did you know some essential oils can’t be used in candles, according to candlescience.com?

This disappointment with our first candles launched us into A LOT of research.  It turns out that many people have these problems when making essential oil candles, but there are all sorts of conflicting ideas on how to make the candles better. (Not to mention AI generated information, which is really conflicting… don’t worry, this post was written by real people.)
We share with you in this post what worked for us (after many trials!). Keep in mind; however, that essential oil candles are going to have a light fragrance (don’t expect a Yankee Candle or Bath and Body Works smell – these are generally made with synthetic fragrance oils, not essential oils). If you want a really strong smelling candle, fragrance oils are probably the way to go, but we wanted our candles to be all natural, so we stuck with the essential oils. Alternatively, if it is just a lovely scent in your home you are looking for, a diffuser* works much better than a candles.

(*If you are mostly looking for a beautiful and natural scent in your home, we recommend using an essential oil diffuser – it is so easy to add a few drops of oil and change the scent on a whim. But if you are looking for the ambiance of candles or a thoughtful gift to give, read on… We are sharing a plan that should make essential oil candle making fun and easy for the whole family!)

Recipes we love…

Here are our favorite recipes to make delightful candles for all seasons. Please read the entire post for specific directions on how to make the candles (it’s not quite as simple as melting wax and mixing in oils, but don’t worry, our printable eBook on Etsy gives step by step directions to make it a joy!). 

Sunshine and Happiness

A delightful candle for spring and summer, with notes of lemon and lavender and a touch of sweet vanilla.

3 oz. soy/coconut wax beads (measured by weight)

3/4 tsp. lavender essential oil

1/4 tsp. vanilla essential oil

1/2 tsp. lemon essential oil


Autumn Joy

A warm and spicy candles that works well for autumn and even into the winter months.

3 oz. soy/coconut wax beads (measured by weight)

1/2 tsp. cinnamon cassia essential oil

1/2 tsp. clove essential oil

1/2 tsp. petitgrain essential oil (a citrus scent)


Merry Christmas!

An evergreen forest, sparkling snowfall, and candy cane delights in one sweet candle. Perfect for gift giving!

3 oz. soy/coconut wax beads (measured by weight)

1 tsp. balsam fir essential oil

1/2 tsp. peppermint essential oil


Do you want to make all natural essential oil candles too?

We have a plan to make candle making a delight for the whole family!

Get our candle making eBook on Etsy…

***Please note that that candle making might be best for older children and adults. The hot wax and the essential oils that may sting the skin and eyes make it a little tricky (risky) for young children. However, younger children can be great helpers with some parts… attaching the wick to the base of the candle containers and/or helping to stick labels on to candle covers when the candles have cooled.***  

What you will need…

Below you will see a detailed explanation of the specific supplies you’ll need. But we have created a simplified shopping list so you can see everything in one place. It is a long list, but once you have your supplies, making candles is really relaxing and fun for the whole family.

Supply details…

freedom coconut wax

Freedom Organic Coconut Soy Wax Blend

This soy/coconut wax makes beautifully smooth candles, and can be melted in the microwave to make candle making even easier. Coconut/soy wax allows the essential oil scents to shine through. (On our first attempts, we tried beeswax, which itself has a powerful smell, so it does not work well with essential oils.) One 5 lb. bag of wax should make about 25 candles using our recipes (3 oz. of wax per candle).

food scale

Small food scale

To measure the right amount of wax beads, you’ll need a food scale. (We could not find our particular scale for sale at the moment, so we  have provided an alternative link.)

candle thermometer

Thermometer

Essential oils need to be mixed in at 185 degrees F, so you’ll need a thermometer. It does not work to just see that the wax is melted. We did not have a pot clip for our thermometer, but it would be helpful to have one to hold the thermometer in place.

Glass measuring cup

To melt the wax in the microwave, you’ll need a glass measuring cup (probably one that becomes exclusively for candle making, as cleaning it might be difficult). We got a few glass measuring cups so that we had one for each different candle scent combination we made.

Protected surface and potholders

You’ll want to have a protected surface on which to set your candle making supplies – hot wax can splatter even if you are being very careful. A large piece of cardboard works well (then you can throw it away when you are done). You’ll also need potholders to take the hot measuring cup out of the microwave each time.

Long-handled stirring spoons

It’s not so easy to get wax off of spoons, so we found it was best to get spoons with long handles just for our candle making.

4 oz. candle jars or tins

We used both 4 oz. Ball Mason glass jars and 4 oz. candle tins. Both work well, depending on the look you love. If you might be transporting or mailing the candles, a tin would obviously be less breakable, but the glass jars look especially lovely when lit and seem to be quite sturdy as well.

right size wick

Eco wick size 8

Wow! Who knew there were so many different types and sizes of wicks. Some wicks make the essential oil candles smell bad, and some wicks are too small or too big to make the wax melt correctly. We finally found that this wick (Eco wick size 8) is the perfect one to make the wax in a 4 oz. container melt perfectly, without leaving a ring of unburned wax (see photo above), and without getting too hot. The scent throw with this wick is great too!

Wick stickers

To attach the base of the wick to the base of your candle containers, you’ll need wick stickers. With guidance, placing the wick stickers and sticking on the wicks is a fun activity for young children (perhaps ages 4 to 5) who want to join in the candle making fun, but stay away from the hot wax.

Wick holders

To keep the wicks staying centered and tall, you’ll need wick holders. Getting a multipack is a good idea if you want to make more than one candle at a time (you’ll need to keep the wick holder in place for about a day until the wax has completely hardened).

Essential oils

In the recipes above (and in our printable guide) you’ll find a few essential oil combinations we have found to work well. The quantities of oil and the types of oils are quite particular with candles, so we are sharing some recipes that we have found to work, after lots of trial and error. Be sure to use good quality essential oils. We like the Now brand – it tends to be good quality at a moderate price: lemon, lavender, vanilla, cinnamon bark, clove, petitgrain, fir, peppermint

(When calculating how much oil to buy, consider that a 1 oz. bottle of essential oil provides about 6 U.S. teaspoons of essential oil.)

Teaspoon set

We measure our essential oils using 1/4, 1/2 and 1 teaspoon spoons.

Labels and Cardstock

We used Canva to make some sweet labels for our candles. You can find our printable labels on Etsy… or enjoy making your own by hand or with Canva (Canva is so much fun!). While you could get stickers to print your candle labels, we chose to use cardstock, cut with a circle punch and glued on to the cover of the candle container. Gluing on the labels allows them to be repositioned more easily than with stickers. (Our eBook on Etsy does have a printable sticker option set up for Avery circle stickers, but we think cardstock and circle punch works better.)

circle punch

Circle Punch

To cut the perfect circle label, we recommend this 2 1/4″ circle punch. Once we bought this, we have found so many other fun projects to use it for as well.  See our video on how easy (and fun!) it is to use.

Gluestick

Gluing on the labels is another fun way for younger children to participate in the candle making project.

Candle warning labels

Funny fact – I sent one of these candles to my sister, without letting her know that I had made it. It had a “handmade with love” label on the top, but when she saw the warning label on the bottom, she was confused and decided not to light the candle, thinking “Who knows what the real story of this candle is.” Luckily it eventually came up in conversation that I had made the candle, and she happily lit it. Whether or not to use these warning labels is up to you (I did not realize that they might make people think that the candles are not homemade), but one important thing they list is that the wick needs to be kept trimmed short – this actually helps the candle smell better when burned. Our eBook on Etsy also has printable safety labels that look more homemade – so as not to confuse the candle recipient. To punch out our safety labels in the eBook, you’ll need 1″ circle punch too. (The eBook also has gifting info cards that can but tucked in with a gifted candle, rather than placing a safety label on the bottom of the candle. These can be cut out with scissors or a paper cutter.)

How to make the candles – step-by-step…

Once you have your supplies, you’re ready to make some lovely candles! We scoured the Internet to find the best candle making directions, but we did not find any one source that gave us the whole picture of how to successfully make essential oil candles. Our printable eBook brings together essential information that we found from The Candle Journey (and yes, it has been a journey!), Oily Chic (all about essential oils), and Candle Science (we think candle making can count as a homeschool science lesson), along with lots of experimenting here at Sparkles and Sprinkles.
We hope you can skip the long hours of research and jump right into the fun part of candle making by following our recipes and guide. You can get our printable step-by-step guide, along with our printable candle labels on Etsy. Once the guide is printed, candle making becomes a screen-free activity – hooray!

Ready to get our printable step-by-step guide with visuals for each step and printable labels? Click here to find it on Etsy.

Happy candle making!

P.S. We like to pair activities with reading here at Sparkles and Sprinkles. May we suggest some lovely books about Saint Hildegard to accompany your candle making journey? A picture book for children by Demi and some spiritual reflections called Let There Be Light. ENJOY!

Note:  Some links on this page are Amazon Affiliate links.  Sparkles and Sprinkles is a participant in the Amazon Associates Program, an affiliate advertising program designed to provide a means for sites to earn advertising fees by advertising and linking to Amazon.com.

Other links may or may not be affiliate links.  We provide links because we have found these products or services beneficial, and we think you might too.

Cookie Cutter Needle Felting – perfect beginner project

Cookie Cutter Needle Felting – perfect beginner project

Thinking about giving needle felting a try? Follow our simple video tutorial for a delightful project that is perfect for beginners!

At Sparkles and Sprinkles, we love just about everything that might fit in the category of handcrafts. However, we had put needle felting in a category of its own – “too dangerous!” Fortunately a family in our homeschool group asked if we might be able to learn needle felting in our handcraft club. With this motivation, we decided to be daring and give it a try.

It turns out that needle felting is not so scary after all (whew!). We decided to start with the easiest type of project, as recommended in a lovely book about needle felting, Needle Felting for Beginners: How to Sculpt with Wool. This book describes how the wool just naturally weaves itself together by getting poked with a felting needle – so simple!

Needle Felting for Beginners recommends using a cookie cutter to help make the shape. With this method, one is much less likely to get a poke from the felting needle. These sweet little wool creations made with the help of a cookie cutter can be strung into a garland to decorate your home, if you like. We made a fall garland with pumpkin shapes, but you could use any shape (hearts, flowers, stars, Christmas trees….)

We also learned that finger protectors can be worn to make getting poked even less likely. Of course young children should we watched and guided carefully, even with these precautions. In our opinion age 5 would probably be the youngest age for projects like this. 

Are you ready to try needle felting? We’ve put together a shopping list with clickable links so that you can easily gather supplies. Then watch our video to find out just how easy and fun… and even, to our surprise, relaxing… needle felting can be.


Needle Felting Shopping List

Needle Felting Pad: We wanted to make a bunch of pads for our homeschool group club, so we bought 2″ thick foam pad and cut it into several 5×5 inch pieces. If you just need one pad, then this felting pad from Desert Breeze would be great.

Leather Finger Protectors: We needed more than one pair, so we chose this pack of 10 pairs of leather finger protectors. If you need fewer pairs, these leather finger protectors could be a good option.

Size 40 Triangle Needle: Needles come in many different shapes and sizes. The size 40 triangle needle works well for this beginner project. The authors of the book we read recommend a size 40 spiral needle for the finishing touches, but we have found the size 40 triangle needle works for the whole project from start to finish. Many people recommend using needles made in Europe for their superior quality. We have used needles from Felted Sky and from Desert Breeze. Both seem to work well and are European-made. (However, even good quality needles can still break, so be sure to use them only in an up and down motion – never pulling them from side-to-side in the wool). Felted sky has a variety pack of needles on Etsy, as well as a multi-pack of size 40 triangle needles (even if you think you only need one needle, it’s a good idea to have extras on hand in case of breakage).

(Or to keep things simple, you might like a kit that includes needles, felting pad, and finger protectors from Desert Breeze. This kit does not include the 40 triangle needle, but we have found that a 40 spiral needle can work for this project.)

Wool: We tried two different wools for our project. Desert Breeze has wool in a variety of colors that works well. We also were very happy with an Etsy seller from West Virginia (Bridget’s Farm Cart) who dyes her wools in beautiful colors, including an orange color that actually comes with a variety of orange shades specifically for making pumpkins. It’s lovely!

Cookie Cutters: If you plan to make a garland, small cookie cutters (about 1.5 inches in diameter) would be best. Any size cookie cutter can work, however. We use these sweet mini pumpkin cookie cutters from The Cookie Cutter Shop. If you are looking for another shape, consider this mini heart or mini star.)

Wool Felt Balls: If you are planning to make a garland, you could make several of your cookie cutter shaped creations, or you could add in some small wool felt balls to add variety and save time.

Embroidery Needle and Embroidery Floss: To string your garland together, you’ll need some embroidery floss and an embroidery needle.


Let’s make some felted pumpkins…

Thanks for stopping by sparklesandsprinkles.blog!

We hope you come to enjoy needle felting as much as we have!

Note:  Some links on this page are Amazon Affiliate links.  Sparkles and Sprinkles is a participant in the Amazon Associates Program, an affiliate advertising program designed to provide a means for sites to earn advertising fees by advertising and linking to Amazon.com.

Other links may or may not be affiliate links.  We provide links because we have found these products or services beneficial, and we think you might too.

Homeschool kick-off week: a joy-filled way to start the school year

Homeschool kick-off week: a joy-filled way to start the school year

Looking for a way to make the start of the school year something to look forward to? And bring happy memories for years to come? How about a homeschool kick-off week?

We’ve been doing homeschool kick-off weeks in one way or another since our oldest daughter started kindergarten. That year we went to a pick-your-own flower farm on the first day of school, as we had decided to name our homeschool Little Flowers School after Saint Thérèse. The reality was that a trip to the flower farm was a bit stressful with little ones – see the signs in the photo below: “Do not walk in the flower beds” and “Choose carefully. You are required to pay for ALL flowers you pick.” It was not the idyllic day of carefree frolicking in flower fields I envisioned, but we did come home with some pretty bouquets, and the day at the flower farm is still a happy memory. Homeschool kick-off days have gotten better from there, and in this post we share with you some examples of our homeschool kick-off days. 

While our homeschool kick-off weeks are quite different every year, there are three things they tend to have in common:

  • some surprise gifts
  • a slow start (doing just one or two subjects a day – more on that below)
  • fun family together time activities 

We usually base the especially fun days on what we plan to study for social studies or science in the coming year… this way our activities relate to everyone, as we tend to do science and social studies as a whole family.


Special Gifts

Our kick-off days start with an idea I borrowed from German teacher at the school where I used to teach. She so kindly wrapped beautiful little gifts to have on each student’s desk on the first day of school. She told me that it is a German tradition for students to be given gifts to start the school year. They are called Schultüte. Her generosity amazed me to do this for so many students! And I’m sure it brought joy to so many students over the years.

Inspired by this, we try to start off our school year with some fun gifts as well. Somehow a beautifully wrapped gift to open brings lots of smiles, even if there might be sadness in summer coming to an end. Rather than just the necessary school supplies, we try to find something special, like pretty pencils with inspirational quotes, or unique pencil cases found at gift shop over the summer. Sometimes we include books and a book journal. For children who are not officially school age, we pick gifts of toys that they might enjoy playing with while the older siblings are doing school work. One year when the big girls needed a real microscope, our little ones received an educational microscope toy.

Here is what our kick off week looked like this year… 

We’ll also share with you some of the curricula we are using this year – we are always grateful for learning about curricula other families love, so we hope our favorites might be helpful to you as well. We have a penchant for a Charlotte Mason approach to learning.

Monday: History Day 

This year we will be studying ancient history, so a brand new DK Eyewitness book about Ancient Greece was sitting by the breakfast table. These books bring history alive, and are so fun to peruse – no one needs to tell a child to pick this up and learn, it just happens!
We then read from Spend the Day in Ancient Greece, which tells the story of a fictional Ancient Greek family and gives numerous craft ideas. We made the first project in the book: an owl made out of clay to represent Athena’s wisdom.
We also started our read aloud from Famous Men of Greece (suggested in the Mater Amabilis curriculum).  The girls did narration and drawings about what they learned in their history notebooks. (History notebooks are so fun, by the way… they give each child a way to express themselves at their own level, whether it be a lengthy written description by a teen or a simple drawing by a preschooler.)
We continued the Greek theme with making Greek salad for lunch and Amygdalota (naturally gluten-free almond flour Greek cookies that symbolizes new beginnings) for dessert. 
ancient greece

Tuesday: French and Music Day

We started our day by cuddling up together and reading from a French children’s book.

The girls then opened some fun gifts – a 3D puzzle of Paris and audio flashcards (a screen-free activity that still allows independent language practice). The 3-D puzzle of Paris turned out to be a hit! It was so fun to put together, and actually provided for hours of (gentle) play in the days to come (as there are little people that can be moved around).

We also took the time to do our Hoffman Academy online piano lessons. (I was at first skeptical of the idea of online piano lessons, but we have now been using Hoffman Academy for years – it teaches not only how to play piano, but incorporates music theory as well, in a very well-thought-out and fun way.)

The highlight of our day was going to a beautiful French cafe for lunch and spending some time playing at a local park with friends. On our drive to the cafe, we listened to the Busy Kids Love Music podcast. (I’m trying to incorporate music history into our curriculum this year without adding in any prep work – this podcast is delightful.)

Wednesday: English Day

The gift for the day was a bookmark making kit and a beautiful newly published book, Because Barbara, about the life of author and illustrator, Barbara Cooney.  (We have at least one budding author and illustrator in our family, so this book was a good inspiration, and everyone loved it!)
I spent time helping each child with their grammar and spelling books. (This year, we are using Catholic Heritage Curricula  for the older girls and The Good and the Beautiful for our Kindergartner.)
The plan was also to make a visit to our local library, but we ended up opting to do this another day as everyone was tired this day. It’s good to flexible and go-with the flow for a joy-filled kick-off week.

Thursday: Math Day

I was able to do a math lesson with each child so that we could get to know the math program. This year, for the first time, our girls are all doing The Good and the Beautiful math – true to its name, it is a visually beautiful program that uses a spiral learning approach.
Our fun activity for math day was really pretty simple… a nature walk where each child gathered nature items of their choice in a little bag, then we came home and thought about how they could relate to math. How many petals are on this flower? Why do flowers have so many seeds? What shapes do you see? How far do you think we walked?…

Friday: Science Day

While we often do our biggest kick-off day on the first day, this year it worked best to do our biggest kick-off day on Friday. My husband takes the day off of work for this day to join us in the fun and add some words of encouragement and special blessing prayers for the start of the school year.
We started the day with pancakes in the shape of bears for breakfast and a gift of pencils with animal erasers… as a little foreshadowing that our special trip would be to the zoo. (Side note: We use our healthy gluten-free cupcake recipe to make the batter for our pancakes. These pancakes are packed with protein for a great start to the day.) 
A trip to the zoo was such a fun way to kick-off our study of biology this year. Below are a few of the many photos we took of the animals. To top off the day, we were able to stop in for some prayer time at church on our way home to thank God for the gift of His creation, and ask God to guide our school year too.

With such a long day at the zoo, we actually waited until the following week to start our science book work. We are using The Good and the Beautiful biology program this year, starting off with mammals. So far I am totally impressed, and the children love the program. I really love how the program has one main teacher guide, and separate (scaffolded) nature journals for each age group. They seem to be spot on for the level of work that seems appropriate for their ages. 

A Slow Start…

You may notice that we only do one or two subjects per day during our kick-off week. I call this a “slow start,” and there are so many reasons I love it:
  • Doing only one subject a day to start gives me time to work one-on-one with each child on each subject, without feeling rushed.
  • As I see how the child connects with the curriculum for each subject, I can better think about how much time each subject might take, and how to weave together a schedule for the year (rather than just guessing at it). Planning a schedule for the year can be overwhelming, nonetheless, so I always try to remember to take it to prayer… with God all things are possible!
  • If there are projects still left undone from the summer (fun things like making photo albums, or not so fun like cleaning out closets), part of the day can be spent wrapping up those things.
  • Doing just one or two subjects a day at the start of the school year provides a more peaceful transition from the freedom of summer to the demands of the school year… both for me as the teacher and for my children.

A few more fun ideas:

Truly, every year is different, so in case it sparks more ideas for you, here are some of our favorite memories from years past:

  • Getting toy boats and sailing them across the neighborhood swimming pool the year we were studying early American history, pretending one end of the pool was Europe and the other end America. (Another benefit of homeschooling… being at the pool while everyone else is at school!)
  • Using couch cushions to make a pretend time machine, then getting in and pretending to blast off to different time periods to get a preview of what we would be learning about in a world history year. Daddy even had the thought to play some time machine sound effects and make a control panel from a cardboard box! Each time we made a stop, there was an activity related to the time period in a different room of the house (an art project, a book to read, music to listen to…).
  • Spending the day seeing monuments in D.C. to kick off the year that civics was our social studies focus, then coming home and trying to make the monuments out of cake and frosting… Is it Cake? style. It was quite a mess on the counter (with frosting, cake, cookies, pretzels, and more… and yes, I had to temporarily give up my “stay away from refined sugar” norm that you see in our blog recipes.) Our girls are still asking if we can please do Is it Cake? again!?
Of course coming up with your own ideas to suit your own family and curriculum for the year is best (and most fun), but we hope these ideas might spark some ideas for you, and add joy to your school year.
May God bless you and your family as you learn and grow together!
P.S. If you are reading this in the middle of the school, you could tuck away the idea for next school year, or maybe do a week like this in the middle of the school year to add a little variety. Kind of like doing a “Just because we can day” (have heard about this great idea from Sarah Mackenzie?) but instead a “Just because we can week!”

Note:  Some links on this page are Amazon Affiliate links.  Sparkles and Sprinkles is a participant in the Amazon Associates Program, an affiliate advertising program designed to provide a means for sites to earn advertising fees by advertising and linking to Amazon.com.

Other links may or may not be affiliate links.  We provide links because we have found these products or services beneficial, and we think you might too.

Sweet Sewing-themed Picture Books

Sweet Sewing-themed Picture Books

Looking for a sweet picture book to share with your little seamstress? We’ve gathered up a few favorites for you from brand-new to classic. Enjoy!

sewing themed picture books

I had a Favorite Dress by Boni Ashburn

I had a Favorite Dress follows the story of a little girl who outgrows her favorite dress. Her mom is always ready to transform the dress into something new with her creativity and sewing skills. This book is full of rhythm and rhyme and has adorable illustations. Perhaps you’ll be inspired to upcycle something in your closet after reading this book.

i had a favorite dress
sewing themed picture books

Sew Sister by Elise Matich

Did you know that space shuttles are covered in panels of special fireproof fabric? Sew Sister tells the story of Jean Wright and the NASA seamstresses who sewed blankets to cover space shuttles. We love how this story speaks to the unique and perhaps surprising ways that we may be called to use our God-given talents and interests. Sew Sister is told in rhyme with beautiful illustrations.

Sew sister NASA
sew sister nasa
sewing themed picture books

The Wordless Weaver by Claudia Cangilla McAdam

This touching book is an especially good read during the Lenten season. The Wordless Weaver imagines the story of a little girl who might have woven the burial cloth for Jesus. The tone is quite serious and sad… but a miracle comes at the end! My children love this story and ask to read it any time of year.

wordless weaver
sewing themed picture books

Corduroy and A Pocket for Corduroy by Don Freeman

As a girl who loved sewing from a very young age, these were some of my favorite books as a child. The Corduroy books tell the story of Lisa and her stuffed bear, Corduroy. Lisa is happy to use her sewing skills to repair Corduroy’s overalls and sew a pocket for him. Perhaps your child might be inspired to mend a toy too after reading these books.

corduroy

You might also enjoy these posts…

Paris Picture Books

Visit the Franophone World through picture books

Sewing Scripture: Writing practice pages

Stitching with Saints: Creative projects inspired by the saints

Note:  Some links on this page are Amazon Affiliate links.  Sparkles and Sprinkles is a participant in the Amazon Associates Program, an affiliate advertising program designed to provide a means for sites to earn advertising fees by advertising and linking to Amazon.com.

Other links may or may not be affiliate links.  We provide links because we have found these products or services beneficial, and we think you might too.

Stitching with Saints

Stitching with Saints

Come learn about some holy women who loved to work with their hands, including Our Blessed Mother, Saint Zelie Martin, and Saint Rose of Lima. Then be inspired to try some stitching projects of your own. In this post we provide links to resources to learn about lace making and embroidery. We also have links for beautiful Catholic fabric to inspire your next sewing project. 

Note: We have a number of video links in this post, and we have noticed on some devices (with lazy load), the video link images do not appear. In this case, please click on the text link to go to the videos.

Saint Rose of Lima

Saint Rose of Lima is the patron saint of embroidery.

Embroidery can be a fun way to learn how to sew. A project we love that can also make a sweet gift is a hand emboidered flour sack towel. Simply sketch your design with pencil on a portion of the towel, attatch an emboidery hoop, and start stitching (the video below gives some great ideas for a variety of stitches).

Saint Zélie Martin

Saint Zélie Martin, the mother of Saint Thérèse of Lisieux, was a talented lacemaker.

Lacemaking is not something we have tried at Sparkles and Sprinkles, but we think it sounds like a fun challenge. How about you? Do you want to give lacemaking a try? We have gathered together a few videos about lace making to help you get started. The first one is from Alençon, the town where Saint Zélie and her family lived. 

zelie martin lace

We found this picture of beautiful lace made by Saint Zélie in the book Thérèse and Lisieux by Pierre Descouvement.

Can’t see the image? Click here to see the beginning lace making video of lace from around the world.

Our Blessed Mother Mary

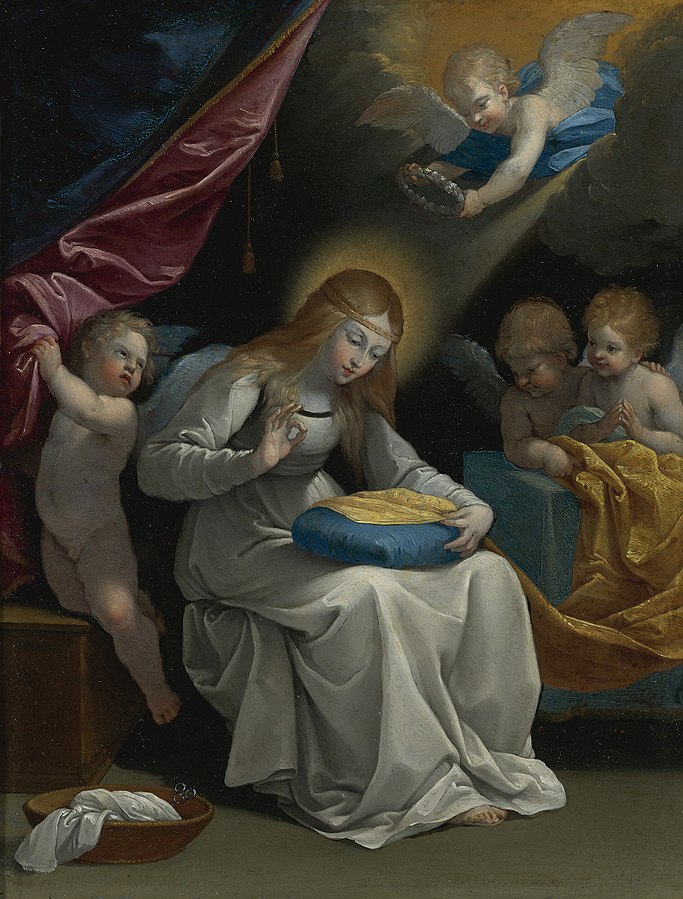
We can imagine Our Blessed Mother sewing for the Holy Family.

Making a baby Jesus doll or making clothes for a baby doll could be a beautiful way to think about Our Blessed Mother as you sew. For a little inspiration, we are posting a photo of a Waldorf-style baby Jesus doll we made a few years ago. Perhaps sometime we’ll make tutorial on how to make this sweet little doll.

jesus waldorf doll

Sewing Sisters

Many religious sisters spend time making beautiful vestments and church linens.

sister wilhelmina

You may have heard of Sister Wilhelmina, whose body was found to be incorrupt. She was the foundress of the Benedictines of Mary, Queen of Apostles. This religious order may be best known for their beautiful singing, but they also spend part of their days sewing vestments for the Church.


This video gives a glimpse into the daily life of the sisters of Benedictines of Mary, Queen of Apostles (vestment making is mentioned around minute 3).

Are you inspired to make vestments? A fun way to start might be making miniature vestments, as used in Catechesis of the Good Shepherd classes. Here is a link for a pattern sold on Etsy.

Catholic Fabric We Love

A sweet friend introduced us to Spoonflower a few years ago. We had no idea that this delightful treasure of fabric with Catholic designs existed. We are so happy to share with you some of our favorite Catholic fabric designers on Spoonflower…

spoonflower catholic fabric

Littleliteraryclassics on Spoonflower has fabric to make simple pocket saint dolls. This is a darling little project for the beginning seamstress. They can be sewn by hand or by machine. In this photo, we used pinking shears to cut around the edge so that the fabric did not even have to be turned inside out for children making their very first (big) stitches.

marigold catholic goods co

Marigold Catholic Goods Co. has beautiful designs! If I could, I would buy them all. The color palette and designs bring such peace and joy. I think you will enjoy them too. We made a pennant banner for a garden party using the “Consider how the wildflowers grow” fabric from this designer. Definitely check out the other designs in this shop too! And if you are not up for a sewing project, but love the designs, you can find these beautiful designs on mugs, scarves, blankets and more in the Catholic All Year Marketplace.

spoonflower hail mary fabric

Our homeschool group sewing group used the “Hail Mary” fabric from The Little Rose Shop to make some doll pillows and blankets. The Little Rose Shop has so many other sweet designs as well!

marigold catholic goods co. pennant

“Sew” delightful… if you would like to make a pennant banner too, we recommend Leigh Ann Wilke’s tutorial . She figured out the math on how to make the best use of the fabric! So it’s a breeze to make it. 

We hope you’ve enjoyed reflecting on sewing with us.

You might also enjoy these posts… 

proverbs sewing

Sewing Scripture: Cursive and Printing Practice Pages

blossoms

Blossoms on the sidewalk: Embracing Creative Messes

doll and me dress

Easy pillowcase dresses: Doll and Me Dress Tutorial

Note:  Some links on this page are Amazon Affiliate links.  Sparkles and Sprinkles is a participant in the Amazon Associates Program, an affiliate advertising program designed to provide a means for sites to earn advertising fees by advertising and linking to Amazon.com.

Other links may or may not be affiliate links.  We provide links because we have found these products or services beneficial, and we think you might too.

Blossoms on the sidewalk: a little reflection on creative messes

Blossoms on the sidewalk: a little reflection on creative messes

If you happen to be stopping by Sparkles and Sprinkles, it probably means that you are the parent of creative children, who might just make some creative messes sometimes, or perhaps you are the creative culprit making (and leaving) messes, as I am too.

So, though Sparkles and Sprinkles is not normally a place for reflective articles, we are posting one today… 

A few weeks ago, I happened to have the chance to take a walk by myself on a beautiful spring day. As I walked along the sidewalk, I found myself delighting in walking through an abundance of pink apple blossoms, which had fallen on the sidewalk from the beautiful tree above. I silently thanked God in my heart for this gift of fluffy pink blossoms I was walking through on the sidewalk.

A few days later, it was Saturday cleaning day in our house, and as I sat down drinking some tea, and having a little prayer time after breakfast (getting ready for the tasks of the day ahead), those blossoms on the sidewalk floated into my mind.

One of the ways we are made in the image and likeness of God is that we love to create, just like God does.

It occurred to me that one of the ways we are made in the image and likeness of God is that we love to create, just like God does. God is so abundant in his creation: not just one blossoming tree, but many; not just a few blossoms on each tree, but an overwhelming beautiful abundance of blossoms. With this abundance of creativity comes what one could call “a mess.” But in fact no one would think of an abundance of pink blossoms on the sidewalk as a mess, but rather, just a beautiful sign of spring.

Of course God does have a plan for picking up this “mess” – the wind eventually blows it away, or it’s washed by the rain, or perhaps even swept away by someone in a nearby house as the yardwork is done. However, it’s usually not cleaned up instantly, and as it lingers on the sidewalk, no one worries. And perhaps, others, like myself, even delight in the “mess” of blossoms.

So as I sat sipping tea and reading the Mass readings in my Magnificat, it occurred to me that I could think of the messes strewn around our home like blossoms on the sidewalk. Yes, they would have to get picked up eventually, but as they sit there, they don’t have to be considered as an eyesore, but rather a sign of the springtime of the creativity of our children.

Yes, the messes would have to get picked up eventually, but as they sit there, they don’t have to be considered as an eyesore, but rather a sign of the springtime of the creativity of our children

Since that morning, I have been trying to look at the messes, take a deep breath, say to myself, “Blossoms on the sidewalk,” and then more kindly and patiently figure out a pick up plan. So…

Paper scraps, glitter, and marker caps all over the floor… deep breath… blossoms on the sidewalk.

Legos all over the floor… deep breath… blossoms on the sidewalk (if only they felt like blossoms when stepped on, oh well!)

Hair binders and Barbie accessories strewn on the rug and down the hallway… deep breath… blossoms on the sidewalk.

Flour dust and batter drippings lingering on the counter… deep breath… blossoms on the sidewalk.

Admittedly, sometimes I’m the creative mess-maker… so, candle making supplies all over the counter, and the sewing machine still not put away, surrounded by scraps of fabric and pieces of thread… deep breath… blossoms on the sidewalk.

Praise God for the gift of being made in His image and likeness, and for the gift of creativity He planted in us. Creative work sometimes leaves trails of messes… no worries, just more beautiful blossoms on the sidewalk. Delightful. Beautiful. Creative.

– Written one morning on scraps of paper with a dull colored pencil, as a pen could not be found, and opening the computer sounded unappealing.


Ready to sprinkle some blossoms of creativity? We have some ideas for you…

Click here for our

craft tutorials.

Click here for our

kid-friedly recipes.