Hand-sewn doll clothes

Hand-sewn doll clothes

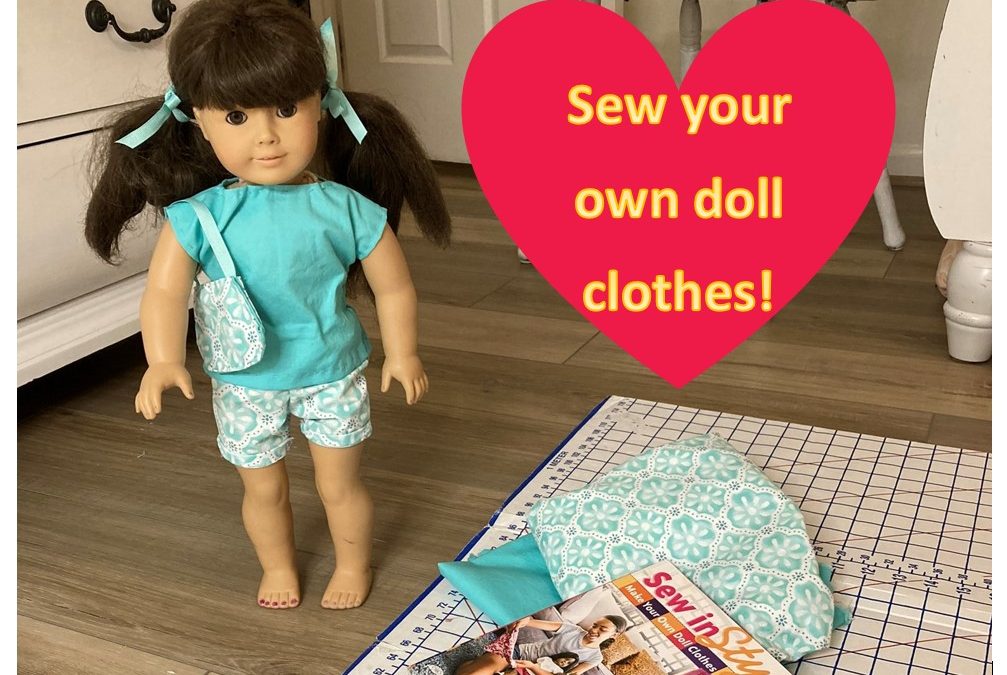
Ready to make a cute new outfit for your doll?  It’s so easy with this beautiful pattern book by Erin Hentzel!  We found this book to be so much better than simply using a packaged pattern.  The photos are adorable, and very helpful for the young seamstress.  Even if you have not sewn before, the book gives step by step instructions for making the clothes from start to finish.  If you are an advanced seamstress, this book is still wonderful!  Each pattern shows the level of difficulty, assigning a certain number of stars to show the level.  The patterns are for 18″ dolls (American Girl-sized dolls).

erin hentzel sew your own doll clothes
American Girl Doll Clothes hand sewn

We decided to try 3 of the patterns in this book, and sew them all by hand.  Of course it would be faster to sew the clothes with a machine, but they can all be sewn by hand as well.

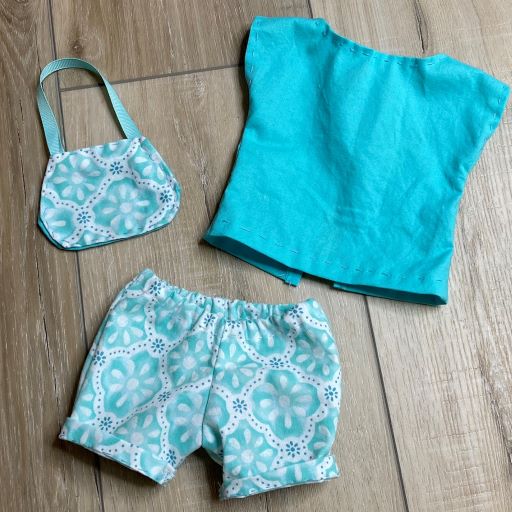
We chose a coordinating solid and print to make this ensemble: a purse, a top, and shorts.  The best fabric to use for these patterns is light-weight cotton quilting fabric.

To get started, watch our YouTube video for tips on cutting out the pattern (especially helpful for beginners).


Some tips for sewing your ensemble by hand…

We made a few modifications to the instructions to make the hand sewing easier.  For the purse, we trimmed off the edges of the fabric to about an 1/8″ from the seam.  This made it so that when we sewed the front and the back of the purse together, we did not have to sew through so many layers.  (We made our first purse without trimming the fabric, and we found it could be a bit difficult to sew through so many layers of fabric, especially for little hands.)

We chose to use snaps to fasten the back of the shirt together. (Click here to watch our video on sewing snaps.)The pattern book suggests Velcro; however, hand sewing through Velcro can be a bit cumbersome.  We simply folded over each side of the back of the shirt by a quarter of an inch, and made a seam.  Then we sewed on a snap set at the top, and another snap set about 2 inches from the top.  Just for fun, we embellished the back of the top with little bows too.

The modification we made for the shorts was to use 1/8″ elastic, rather than the wider elastic suggested in the book.  This allowed us to not be as concerned about keeping our stitches super close to the edge of the casing.  We used a 13″ length of 1/8″ elastic and then tied a knot about 1″ from the end to secure it, rather than sewing through the elastic.

Another helpful tip for sewing these items by hand is to use a ruler and a pencil to mark off a 1/4″ from the edge of your fabric when needed.  This will help the stitches to be straighter, especially for beginners.

Of course for the clothes to stay together well, the stitches should be small.  1/8″ or smaller in length.  We used a running stitch for all of the items we sewed; however, to make them even sturdier, a back stitch could be used.  We chose to thread our needle and sew with double thickness of thread.

We found “finger pressing” – using your finger to fold and press the fabric, rather than an iron – worked well for these patterns.  (However, ironing the whole piece of fabric before cutting out the patterns is important!)  Using finger pressing, rather than an iron makes it easier for children to work on these projects on their own without having the use a hot iron.  It is helpful in some cases (such as the hem of the shorts) to pin after finger pressing.  

We have only tried three patterns from Sew in Style: Make Your Own Doll Clothes, but we can’t wait to try more!  If you would like to find out more, or purchase the book, please click on the image.  Happy sewing!

Enjoy your new doll outfit!

Our 10-year-old had fun taking these pictures with her doll playing outside, sporting her cute new outfit…
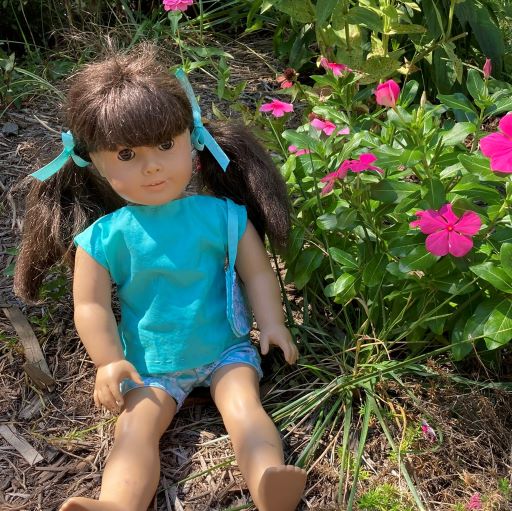
American Girl Doll Clothes hand sewn

If you love dolls as much as we do, you might enjoy some of our other doll ideas:  knit a doll hat and doll party ideas.

american girl doll knit hat
American Girl doll party ideas

Note:  Some links on this page are Amazon Affiliate links.  Sparkles and Sprinkles is a participant in the Amazon Associates Program, an affiliate advertising program designed to provide a means for sites to earn advertising fees by advertising and linking to Amazon.com.

Other links may or may not be affiliate links.  We provide links because we have found these products or services beneficial, and we think you might too.
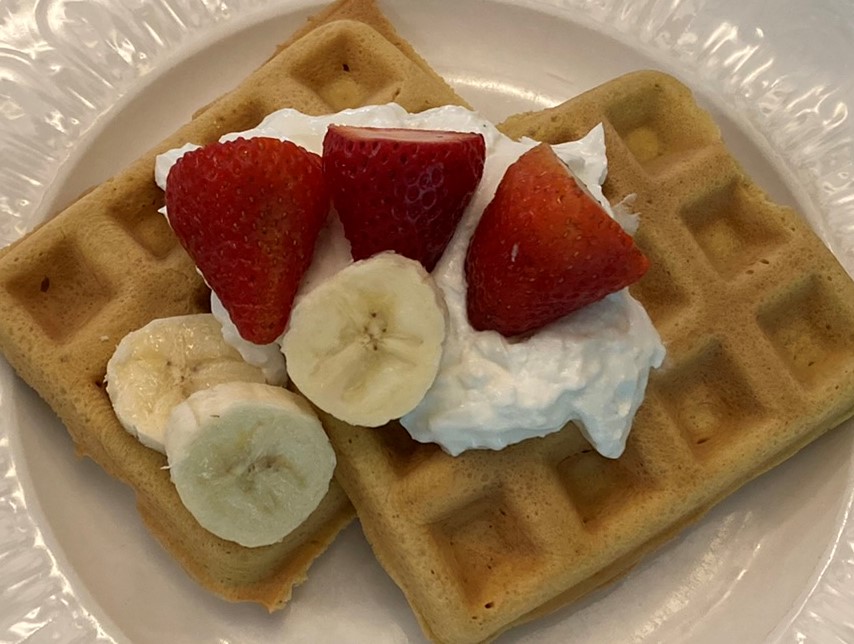
Beautiful Sunday Waffles {gluten-free, high protein, low-carb}

Beautiful Sunday Waffles {gluten-free, high protein, low-carb}

When we first started making these waffles, we named them “beautiful Sunday waffles” because the whole family loved them… and they were so delicioulsy filling that no one complained of being hungry all through Sunday Mass.  We were even able to come home after Mass and not feel rushed to get lunch on the table.  Hooray!

Only 3 simple ingredients are needed for these protein-packed waffles:

  • natural salted peanut butter
  • eggs
  • vanilla extract


Of course these waffles can be made any day of the week!  We find they are great on school days too.  I like to make a large batch on the weekends, and reheat them in the microwave for quick and nourishing weekday breakfasts.  Waffles can be stored in the refrigerator for a few days on a plate, covered in plastic wrap.  Waffles can also be placed in a Ziplock bag and kept in the freezer for a number of weeks.  We use 15 eggs in this recipe simply because that is the largest quantity our blender can hold.  However, the recipe could be scaled down to use 10 eggs and 1 cup of peanut butter, or 5 eggs and 1/2 cup of peanut butter.

We use peanut butter in our waffles, but salted almond butter can also work.  Be sure that the nut butter you use is natural and very drippy.  Our favorite drippy natural peanut butter is Welsley Farms Organic Peanut Butter from BJ’s.  We have not tried sunbutter, but we would love to hear in the comments below if that is something that works for those with nut allergies.

Because these waffles are naturally full of protein and low-carb, they can be topped to your delight with toppings you love!  Yogurt and berries?  Maple syrup or honey?  Whipped cream, chocolate and bananas?  What toppings do you love?  Our children love to have waffle decorating contests… stay tuned… we might just have a Sparkles and Sprinkles waffle decorating contest in the coming months!

We typically use a Belgian waffle maker or our Cuisinart griddle fitted with waffle irons.  However, we recently tried out a little waffle maker by Dash.  Our daughters think it is just too cute!  It also comes in a fun variety of colors.  If you like thinner, smaller waffles, the little Dash waffle maker is great.  A little warning if children are helping in the kitchen, though:  the handle is very small and can get hot, so use a hot pad when lifting the handle.  We also found it was helpful to use silicone tongs to remove the waffles from the maker.  If you are making waffles for a crowd, you may want to have a few of these small waffle makers to make more than one waffle at a time.

While most of our recipes on Sparkles and Sprinkles are great for children to help in the kitchen, this waffle recipe is probably best for adults and older children (due to the many eggs to crack and the hot waffle iron).  If your little ones need a fun activity for while you are making this delicious breakfast, we recommend the Learning Rescources Waffle Time play kitchen set.  Our children continue to play with this delightful set year after year.

One final note before we get started.  Though it may not be necessary, we usually butter our waffle iron before pouring the batter.  However, if the waffles do happen to stick, we find that the handle of silicone spoon can help to remove any stuck bits of waffle.  

Let’s make waffles!

Gather your ingredients:

15 eggs

1 1/2 cups natural salted creamy peanut butter (if your nut butter is unsalted, add a dash or salt to your batter)

1 tsp. vanilla extract

Butter (optional – to grease the waffle iron if needed)


Gather your kitchen supplies:

Waffle maker

Blender

Silicone spatula

1 cup measuring cup

1/2 cup measuring cup

1 teaspoon

large (4 cup) glass liquid measuring cup

plates (for finished waffles and for serving)

forks (for removing waffles from the maker, and for serving)

silicone baby spoon (optional – helpful for removing any bits of waffle that might stick to the waffle maker)

silicone tongs (optional – for removing waffles from the maker without the risk of scratching the maker)

Measure, blend, cook, and enjoy!

Step 1

Crack 15 eggs into a large glass liquid measuring cup.

Step 2

Carefully pour the eggs into the blender.  (Hold the blender jar at an angle over the sink while pouring in the eggs from the measuring cup to reduce the risk of spilling the eggs.  Then place the blender jar on the blender.)

Step 3

Measure 1 teaspoon vanilla extract.

Step 4

Pour vanilla extract into the blender jar.

Step 5

Measure 1 1/2 cups peanut butter.

Step 6

Add the peanut butter to the blender jar.

Step 7

Place cover on the blender.

Step 8

Plug in the blender.  (Wait until the cover is on to plug in the blender, to avoid any accidents.)

Step 9

Blend until all ingredients are thoroughly mixed.

Step 10

Butter the pre-heated waffle iron. (Be sure to use a long stick of butter so that your hands do not get too close to the heat.)

Step 11

Pour the batter into pre-heated waffle iron.  Be careful not to overfill the waffle space.

Step 12

Use a silicone spatula to spread the batter evenly.  Add more batter if needed.

Step 13

Close the waffle iron.  Let the waffles cook, according to your waffle iron instructions.  We find about 4 minutes works for our Belgian waffles.

Step 14

Open the waffle iron.  Waffles are cooked when lightly golden brown.

Step 15

Remove the waffles from waffle iron.  Use a fork (without touching the waffle iron) or silicone tongs.

Step 16

Place waffles on a plate.  Repeat waffle cooking steps until all batter is used.


BON APPETIT!

Note:  Some links on this page are Amazon Affiliate links.  Sparkles and Sprinkles is a participant in the Amazon Associates Program, an affiliate advertising program designed to provide a means for sites to earn advertising fees by advertising and linking to Amazon.com.

Other links may or may not be affiliate links.  We provide links because we have found these products or services beneficial, and we think you might too.

Summer Flower Walk and Other Fun Flower Activities

Summer Flower Walk and Other Fun Flower Activities

Here at Sparkles and Sprinkles, we have stepped away from the computer for quite a while… the sunshine and the garden were calling, and we just had to answer.  But we are hopping back into our blog for a bit to bring you some ideas that you can take right back outside:  a flower scavenger hunt, flower arranging for kids, painting a floral still life, and more.  Enjoy!

Summer Flower Walk

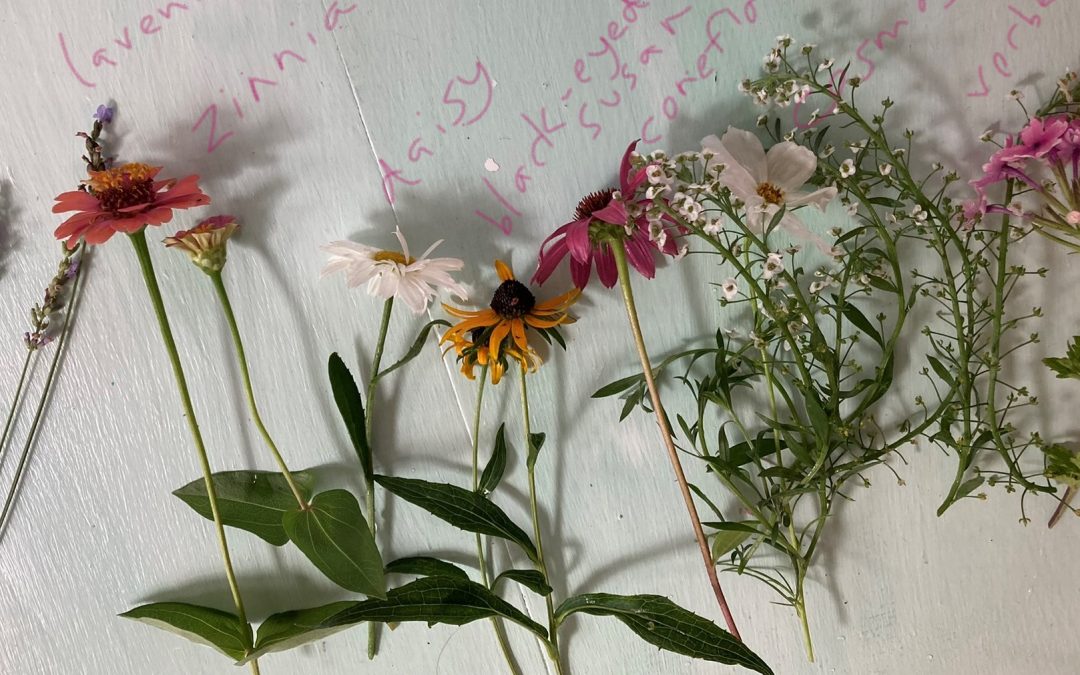
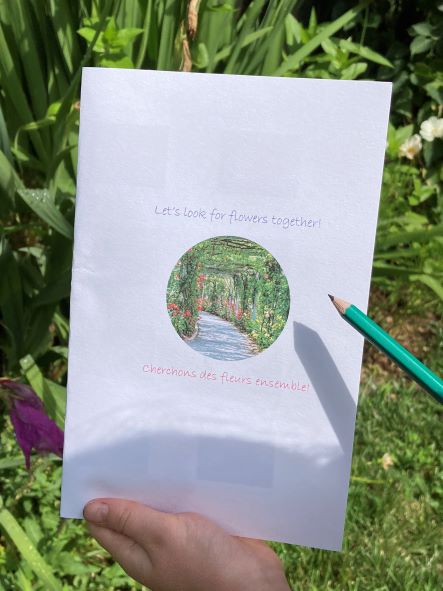
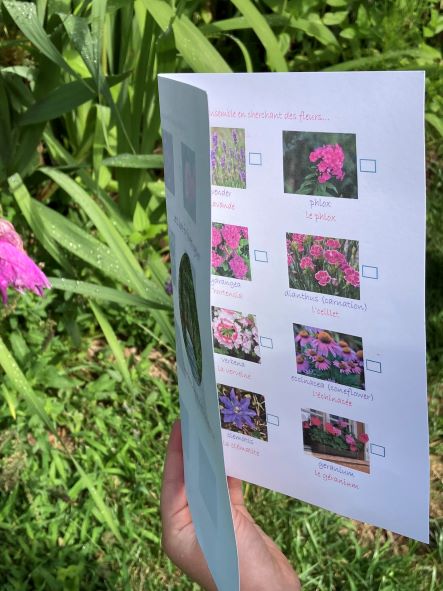
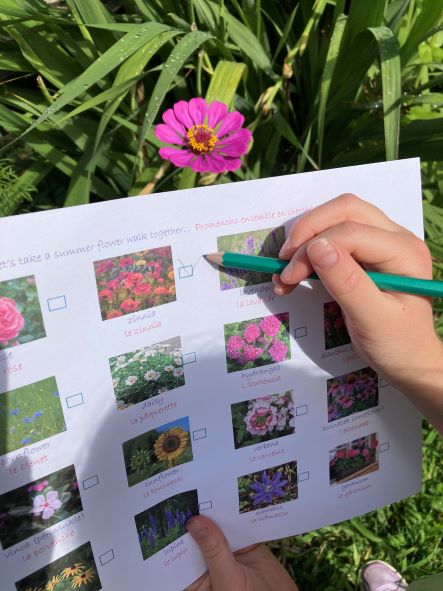
Where we live, it gets too hot in the afternoon to spend much time outside, but our daughters love early morning walks.  This weekend our 7-year-old asked if we could do the spring flower scavenger hunt that we had created for Mother’s Day.  This gave us a great opportunity to talk about how different flowers bloom at different times of year, and inspired us to make another flower scavenger hunt for the summer.

flower walk french english scavenger hunt
summer flower walk french english anglais francais
zinnia flower scavenger hunt

Click on the images below to download your free summer flower scavenger hunt card!  One is in English and the other is bilingual in French and English.  When you print it, print in landscape.  Choose “print on both sides of paper” and click “flip on short edge” in order to make it into a card to invite someone on a flower walk.  Or simply print the first page if you only want a one-sided scavenger hunt page.  It can be printed on regular printer paper, but we recommend cardstock.

summer flower scavenger hunt

Summer Flower Walk in English

french summer flower scavenger hunt francias anglais

Summer Flower Walk (French and English)

Books to enjoy about flowers

When the afternoon heat makes staying inside in air conditioning the best idea, we have some suggestions for you on books we love with a flower theme.  Miss Rumphius and Katie and the Impressionists.  We are also enjoying a delightful new book by Sarah Mackenzie that is inspired by Miss Rumphius. It’s called A Little More Beautiful.

Making bouquets

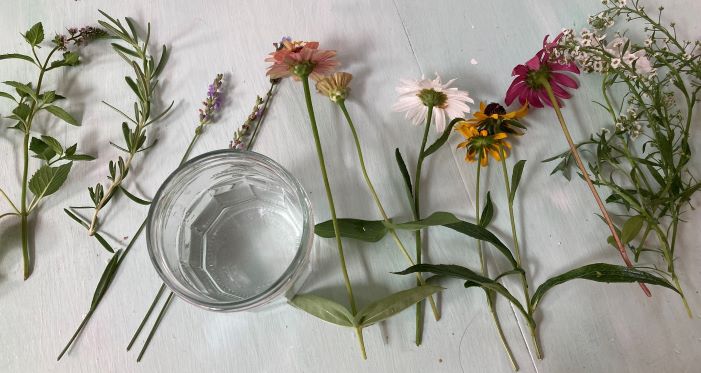
Children seem to naturally love making bouquets, so we love to plant flowers that thrive when cut… roses, zinnias, cosmos, and verbena to name a few.  We also love adding sweet smelling accents to our bouquets – lavender, mint and rosemary – these plants tend to thrive and spread year after year without much care (that’s a big plus when growing a garden of children is really our primary job!).  To help your children make a bouquet, give them options for what can be cut in the garden, then cut the flowers they choose.  (Alternatively, if you don’t have a garden, picking up a bouquet from the store and allowing your children to cut the flowers and make smaller arrangements can also be fun!)  Then allow your child to pick a sturdy, small vase or jar.  Give your children time to arrange the flowers to their liking… a great opportunity for everyone to really take the time to stop and smell the flowers.   

wild flowers to arrange
flower arrangement for kids
wild flower arrangement

Art inspired by flowers

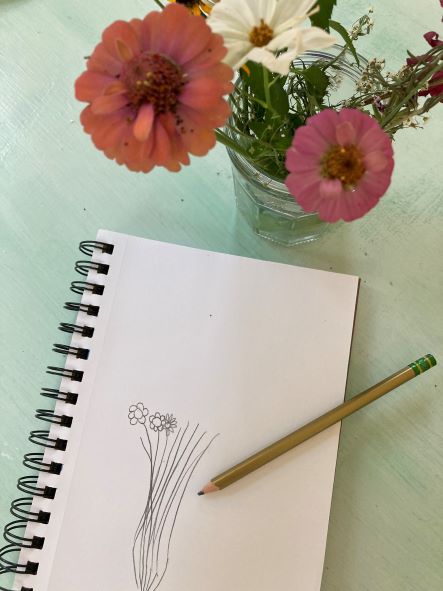
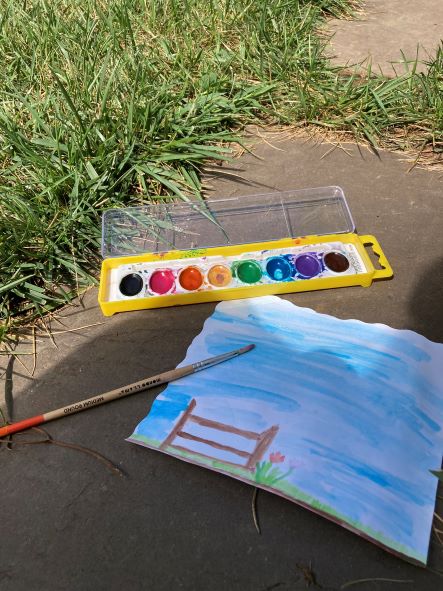
To give your children a chance to really look closely at flowers, painting a still life can be so much fun!  Bringing paper and painting supplies outside to paint in the garden can also be delightful!  Some of our favorite art supplies for painting flowers, and especially painting outside, are the Canson Mixed Media sketch book (great heavy weight paper and easily transportable small size) and Faber-Castell watercolor pencils (sketch and then brush with water) or washable watercolors for younger children.   

flower sketch
flower water color

Enjoy the beauty of summer!

Would you like to find out when we post new craft ideas and recipes?  Consider subscribing to www.sparklesandsprinkles.blog.  Simply enter your email in the form below.  Welcome!

Note:  Some links on this page are Amazon Affiliate links.  Sparkles and Sprinkles is a participant in the Amazon Associates Program, an affiliate advertising program designed to provide a means for sites to earn advertising fees by advertising and linking to Amazon.com.

Other links may or may not be affiliate links.  We provide links because we have found these products or services beneficial, and we think you might too.

Dreamy Chocolate Ice Cream {vegan, low-carb, delicious!}

Dreamy Chocolate Ice Cream {vegan, low-carb, delicious!}

The ingredients might surprise you in this super creamy chocolate ice cream!  This ice cream looks and tastes like your favorite decadent chocolate ice cream, but it is actually vegan, low-carb, and packed full of protein.  If you think “vegan” and “ice cream” can’t be one in the same, don’t run away.  Give this recipe a try.  We think you will be glad you did!  With only 4 ingredients, it’s so easy to make.  Enjoy!

New to making ice cream at home?  We love our Cuisinart ice cream maker, but you can use any ice cream maker of your choice.  The Cuisinart ice cream maker comes in a fun variety of colors to suit your kitchen decor, and has optional additional freezer bowls so that you can make multiple batches of ice cream the same day.  Another great ice cream maker option, if you don’t want to add additional appliances to your kitchen is the ice cream maker attachement for your KitchenAid mixer.  Though we have not tried this one, we think it sounds like a great idea!

cuisinart ice cream maker

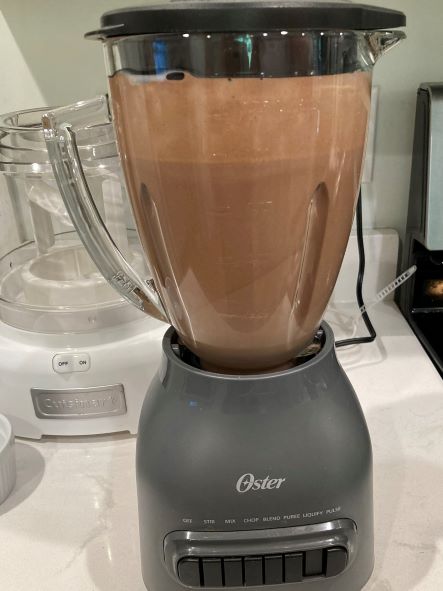
We use a blender to mix our ingredients.   If you are looking for a great, dishwasher safe blender, we recommend the Oster dishwasher safe blender.  We went for many years without a blender, just because I never liked cleaning the blade and jar by hand.  I’m so glad Oster has a blender that is dishwasher safe.  It makes clean up so easy!

Oster blender dishwasher safe

Note:  It is possible to whisk the ingredients together in a bowl if you do not have a blender (we used to to this), but a blender does the job so much faster.  If you do whisk your ingredients in a bowl, be sure to use a very drippy creamy peanut butter.  Also, mix all of the ingredients with only a small amount of milk at first, then add more milk as the peanut butter begins to incorporate into the milk.

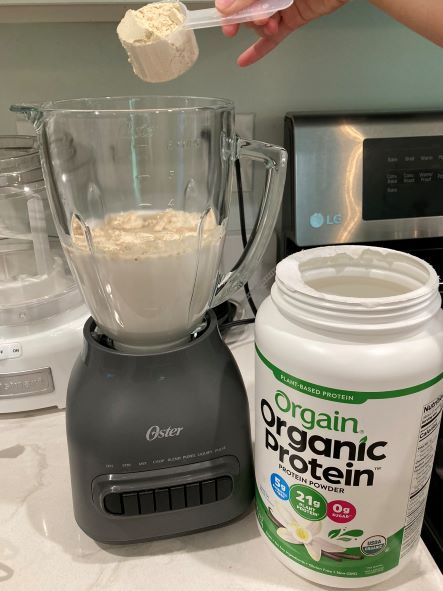
Be sure to use a protein powder you like, as this will impact the taste of the ice cream.  The sweetness in this ice cream comes from the protein powder, so if your protein powder is not sweetened, you will need to sweeten it to your liking.  Keep in mind you can taste the “ice cream” before you put it in the ice cream maker and make any flavor adjustments before you start to freeze the ice cream.  The Orgain Protein Powder we use is sweetened with stevia.  It works well to use chocolate or vanilla flavor protein powder for this recipe.

orgain protein powder

This ice cream is easiest to serve right when it is done being churned.  If you would like it to be a little more firm, you can place it in the freezer for a short time before serving.  If you make the ice cream to serve for another time, or if you have leftovers, keep in mind this ice cream will have to sit on the counter for at least 30 minutes to soften.  We like to store our ice cream in a protein shaker or a Pyrex glass container.  This 28 oz. Contigo protein shaker fits the whole batch of ice cream.  We like the protein shaker because the plastic is thick and will not crack in the freezer (we do not recommend disposable plastic containers, as they tend to crack when frozen).  Storing ice cream in a Pyrex dish with a cover can also be a great idea – this way, you can microwave the bowl for a few seconds if you don’t want the wait time to let your ice cream soften.

Ready to make ice cream?

Gather your kitchen supplies:

  • Ice cream maker
  • Blender (optional, but very helpful)
  • 1 cup measuring cup
  • 1/4 cup measuring cup
  • liquid measuring cup (if not using the blender to measure the milk)
  • Large plate
  • Container for finished ice cream (if not serving right away)
  • Spoons 
  • bowls for serving
  • Spatula for scraping bowl if needed


ice cream making supplies

Gather your ingredients:

  • about 2.5 cups unsweetened almond milk, vanilla or plain (you can use  as little as 2 cups or as much as 3 cups, depending on the consistency you like for your ice cream)
  • 2 scoops (46 g) Orgain Chocolate or Vanilla protein powder (or your favorite sweetened protein powder)
  • 1/4 cup cocoa powder
  • 1 cup creamy natural peanut butter (our favorite is Organic Cream Peanut Butter from BJ’s Wellsley Farms, but any very creamy, drippy, natural peanut butter will work)
vegan ice cream peanut butter, almond milk, protein powder, cocoa

Let’s Make Ice Cream!

Step 1

Pour 2.5 cups of unsweetened almond milk into your blender.

Step 2

Add 2 scoops (46 g) protein powder into the blender.

Step 3

Add 1/4 cup cocoa powder into the blender.

Step 4

Measure 1 cup creamy natural peanut butter, and add into the blender.

vegan chocolate ice cream blend

Step 5

Blend until smooth.

Step 6

Turn on your ice cream maker and pour in the mixture.  Let the mixture churn for about 20 minutes.

low-carb high protein ice cream vegan peanut butter

Step 7

Ice cream is ready when it looks creamy and firm.  You may need to stir the ice cream once in a while as it churns to keep it moving. 

Step 8

Remove the ice cream from the ice cream maker and place it on a large plate. 

chocolate peanut butter ice cream low-carb

Step 9

Scoop the ice cream into bowls to serve immediately, or scoop the ice cream into a storage container to serve later.

chocolate peanut butter low-carb ice cream recipe

And of course... you can always add sprinkles!

This ice cream has no refined sugar and is packed full of protein, so when the question is, “Mom, may we have more ice cream?” the answer can be “Yes!”

P.S.  Looking for low sugar sprinkles?  Find our suggestion from our cut-out cookie recipe.


If you would like more healthy and kid-friendly gluten free recipes, consider subscribing to sparklesandsprinkles.blog.  We will send you emails when we post new recipes and craft ideas.  It’s totally free!  Just enter your email below.  Welcome to Sparkles and Sprinkles!

Great idea for activties to celebrate America’s 250th Birthday, July 4, 2026

Note:  Some links on this page are Amazon Affiliate links.  Sparkles and Sprinkles is a participant in the Amazon Associates Program, an affiliate advertising program designed to provide a means for sites to earn advertising fees by advertising and linking to Amazon.com.

Other links may or may not be affiliate links.  We provide links because we have found these products or services beneficial, and we think you might too.

DIY Fidget Toys! (with YouTube tutorials)

DIY Fidget Toys! (with YouTube tutorials)

Watch these quick YouTube videos to learn how to make a spinner top from a fruit cup, a paper spring, and a balloon stress ball.

Enjoy some fruit from a fruit cup, wash the cup, and turn it into a spinning top in seconds!  Watch the video to find out how.

Feeling more creative?  Color the inside of the fruit cup with permanent markers or paint a fun design with acrylic paint.  Have fun!

Simply cut two strips of paper, and watch the video to find out how to turn them into a fun paper spring.  You’ll also need a glue stick.

Want to add some variety?  Draw designs on the paper before making it into a spring!  So pretty!

Make your own stress ball in seconds!  Just grab a balloon, and some slime (or kinetic sand, playdough, or Model Magic), and watch this video to find out how.  You’ll also need a small water bottle with the bottom cut off, or a funnel.

Time to de-stress…

Want more craft ideas delivered to your inbox?  Simply subscribe to sparklesandsprinkles.blog! 

Do you have a teen or tween interested in making YouTube videos?  Our oldest daughter took a wonderful class from Film School For Teens.  The online classes are created by a Christian family with expertise in film and Youtube.  If you have a child interested in film, you can check it out here:  FS4T

Note:  Some links on this page are Amazon Affiliate links.  Sparkles and Sprinkles is a participant in the Amazon Associates Program, an affiliate advertising program designed to provide a means for sites to earn advertising fees by advertising and linking to Amazon.com.

Other links may or may not be affiliate links.  We provide links because we have found these products or services beneficial, and we think you might too.